
Create and manage breakout rooms during meetings
Before you get started, make sure you have the desktop app
You can create meetings in any version of Teams, but you’ll need Teams for Windows or Mac to create breakout rooms for your team.
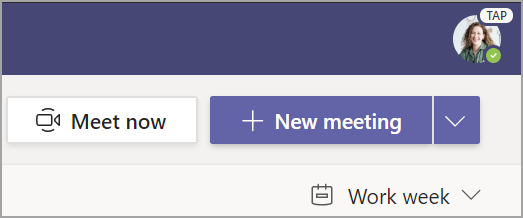
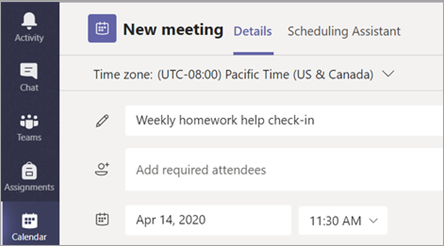
Next, schedule a meeting or Meet now
- Select Calendar
 > + New meeting. You must be the meeting organizer in order to create and manage breakout rooms.
 - Choose a channel to meet in or add people manually.
Create breakout rooms
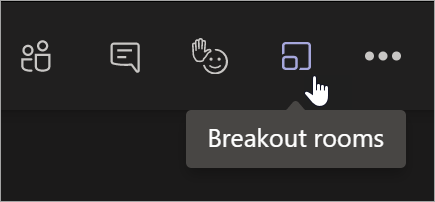
- Join your meeting at its scheduled time and wait for your team to join. Your meeting will open in its own window.
Important: Make sure you join your meeting from the Teams desktop app (Windows or Mac) so you can create breakout rooms.
- When your guests have joined and you are ready, select Breakout rooms from your meeting controls.
- Choose how many rooms you’d like to create from the dropdown.
- Choose whether you’d like Teams to assign students to rooms Automatically or Manually if you’d prefer to assign guests to rooms yourself.
- Select Create Rooms.

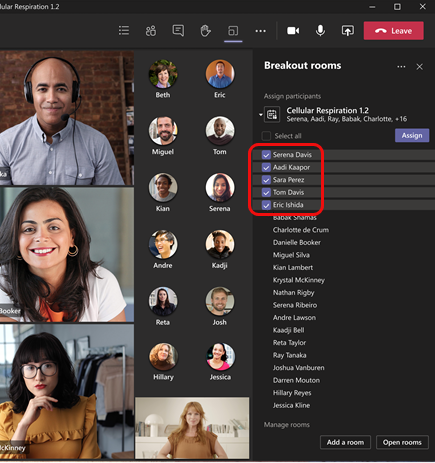
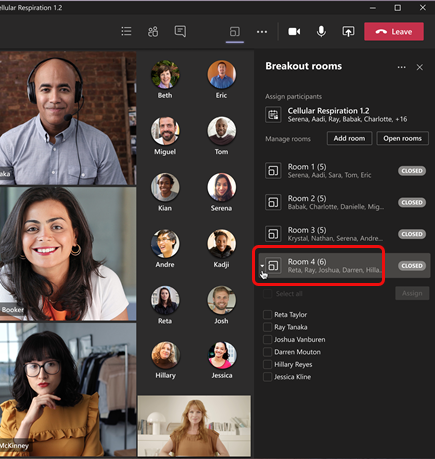
Assign participants to rooms
If you chose Automatically, participants will already be assigned to different breakout rooms.
To manually add participants to rooms:
- Select Assign participants.
- Choose the guests who will share a breakout room by selecting the checkboxes next to their names.
- Select Assign and then select a room for those guests.
- Repeat steps 2 and 3 until the whole team has been assigned to a room.
Note: If this is a recurring team meeting, the same rooms and room assignments will be available for the next meeting.
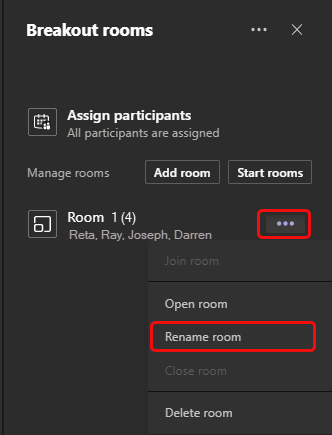
Rename rooms
Name your breakout rooms to reflect small team groups or projects.
- Select More options
 next to the room, then Rename room.
 - Type in the new name and select Rename room.
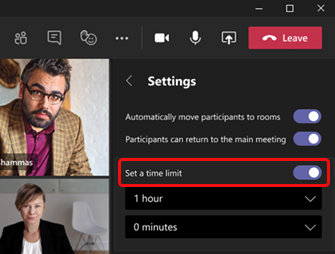
Set a time limit for the breakout session
Keep your team on schedule and aware of how much time they have left by setting a timer. This will make a timer visible in each breakout room. When time is up, breakout rooms will close automatically and your guests will return to the main class meeting.
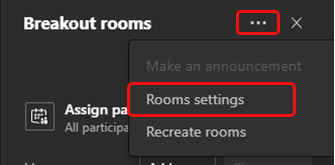
- Select More options at the top of the Breakout rooms pane, then Rooms settings.
- Select Set a time limit, then select the down arrow to choose a session length.
- When you’re done, select Settings to return to the Breakout rooms pane.
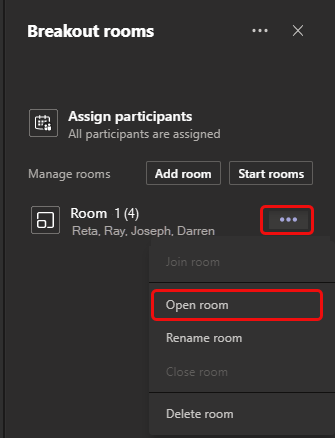
Start breakout rooms
To start rooms individually:
- Select More options next to the room, then Open room.
To start rooms all at once:
- Select Start rooms.
You’ll know rooms have successfully opened when their status changes to Open.

Join a breakout room
To join a room and check on its progress:
- Select More options next to the room, then Join room.
- Select Return when you’re ready to leave the breakout room and return to the main meeting.
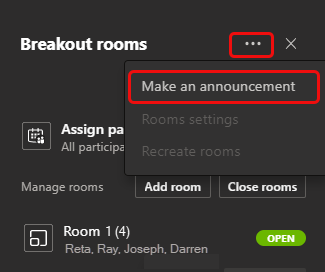
Send an announcement to breakout rooms
Once breakout rooms have started, send announcements to give time updates or share prompts.
- Select More options > Make an announcement.
- Type in your announcement and then select Send.
- Guests will receive a notification in their meeting chat to check for your announcement.
Move guests to different rooms
Move participants to different breakout rooms individually.
To move participants individually:
- Expand the list of participants under a breakout room.
- Hover over a guest’s name and select the checkbox that appears.
- Select More options and then the breakout room you’d like to move the guest to.

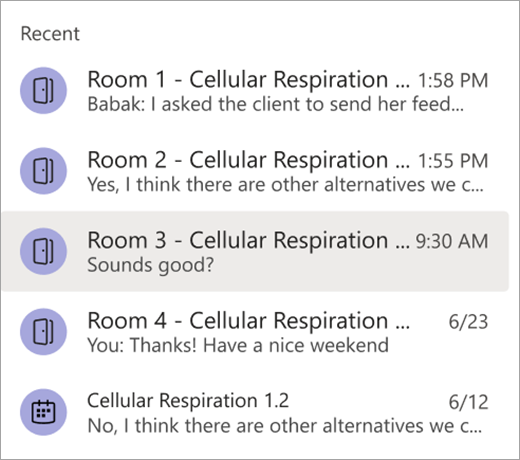
Chat with participants in a breakout room
Each breakout room will have its own chat. You and team will be able to access it from your chats list and from Chat  in the breakout room, just like regular meetings.
- Guests will only be added to a breakout room chat when you start the room. They will be removed as soon as the room is closed.
- You will have access to all breakout room chats.
- Guests can still see the chat history and any files shared after the breakout room is closed.

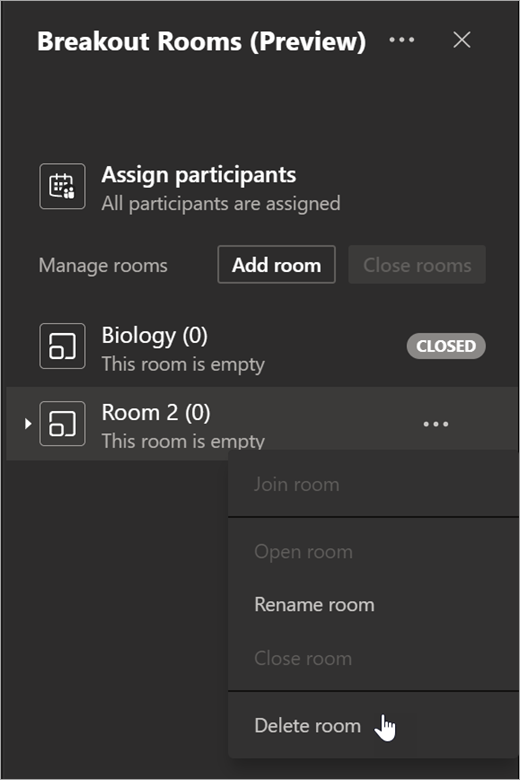
Add or delete a breakout room
To add an additional breakout room:
- Select Add room. Give your new room a name and confirm.
- Add participants to the room using the instructions above.
To delete a breakout room:
- Select More options next to the room, then Delete room.
Close breakout rooms
To close rooms individually:
- Select More options next to the room, then Close room.
To close rooms all at once:
- Select Close rooms.
You’ll know rooms have successfully closed when their status changes to Closed.
- Select Resume when everyone is back from their breakout rooms and you’re ready to meet as a larger group again.
Tip: If you reopen rooms later on, room assignments will remain the same unless you reassign participants or recreate rooms from scratch.

