Today we want to show you how to use Scheduling Assistant from within Teams. Scheduling Assistant allows you to schedule meetings when everyone is available rather than rescheduling a meeting multiple times.
In order to show you how to use scheduling assistant, lets start with ‘how to schedule a meeting’.
Schedule a meeting
There are several ways to schedule a meeting in Teams.
Schedule a calendar meeting
- Select Calendar

- Select New meeting

- Add meeting details and attendees.
- Select Send.
Schedule a meeting from chat
- Select Chat

- Select More chat options

- Select Schedule a meeting

- Add meeting details.
- Select Send.
Schedule a channel meeting
- In Teams

- Add a shared calendar to your team channel.
- Next to Meet now

- Select Schedule a meeting

- Add other attendees who are outside the team.
- Select Send.
Everyone in the team you scheduled the meeting for will receive a personal invite.
You can also invite a channel to a regular meeting by typing the channel name in the Add channel field. Channels can’t be edited or added once the invite is sent. You’ll need to send a new invite with the updated channel.
Notes:
- When you have a meeting in a channel, everyone in the team will be able to see it and join it in that channel. This feature isn’t available in private channels.
- Invitees outside your org won’t have access to the channel calendar.
Invite attendees
You can invite attendees to your Teams meeting while you’re creating it or after.
Up to 1,000 invitees can join and participate in a Teams meeting. Up to 10,000 invitees can join as view-only attendees in meetings that already have 1,000 attendees.
To invite attendees:
- Create a meeting or open one in your Teams calendar.
- Enter names in the Add required attendees

- If anyone is an optional attendee, select Optional in the Add required attendees

- To invite someone outside your org, type their full email address (ex: Joe@example.com).
- If anyone is an optional attendee, select Optional in the Add required attendees
- Select Send or Send update. Invitees will receive an email with a link to the meeting.
Scheduling Assistant
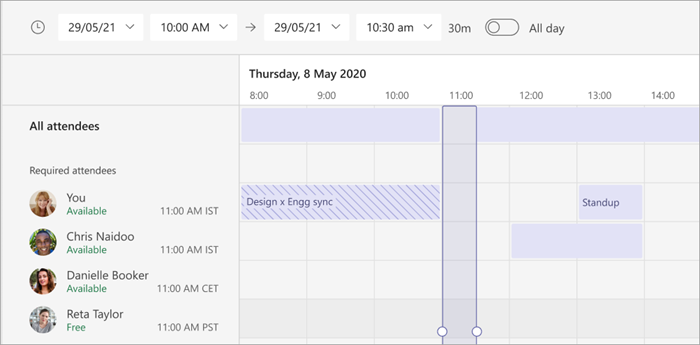
At the top of your scheduling form, select Scheduling Assistant to find a meeting time that works for everyone.
In Scheduling Assistant, you can view other attendees’ time zones, schedules, and availability during different timeslots. The Scheduling Assistant grid will show each attendee’s schedule.
- Shaded areas show when attendees are busy or have tentative meetings.
- Unshaded areas show when attendees are free.

After you fill out the details, select Send to close the scheduling form and invite attendees to the meeting.

