This ProTip is first going to go over the basics of an SMS screen as well as an EMAIL screen. At the end of this ProTip, we are going to show you where all those draft communications get saved! I have captured most of this information directly from a Rock Training.
Sending SMS
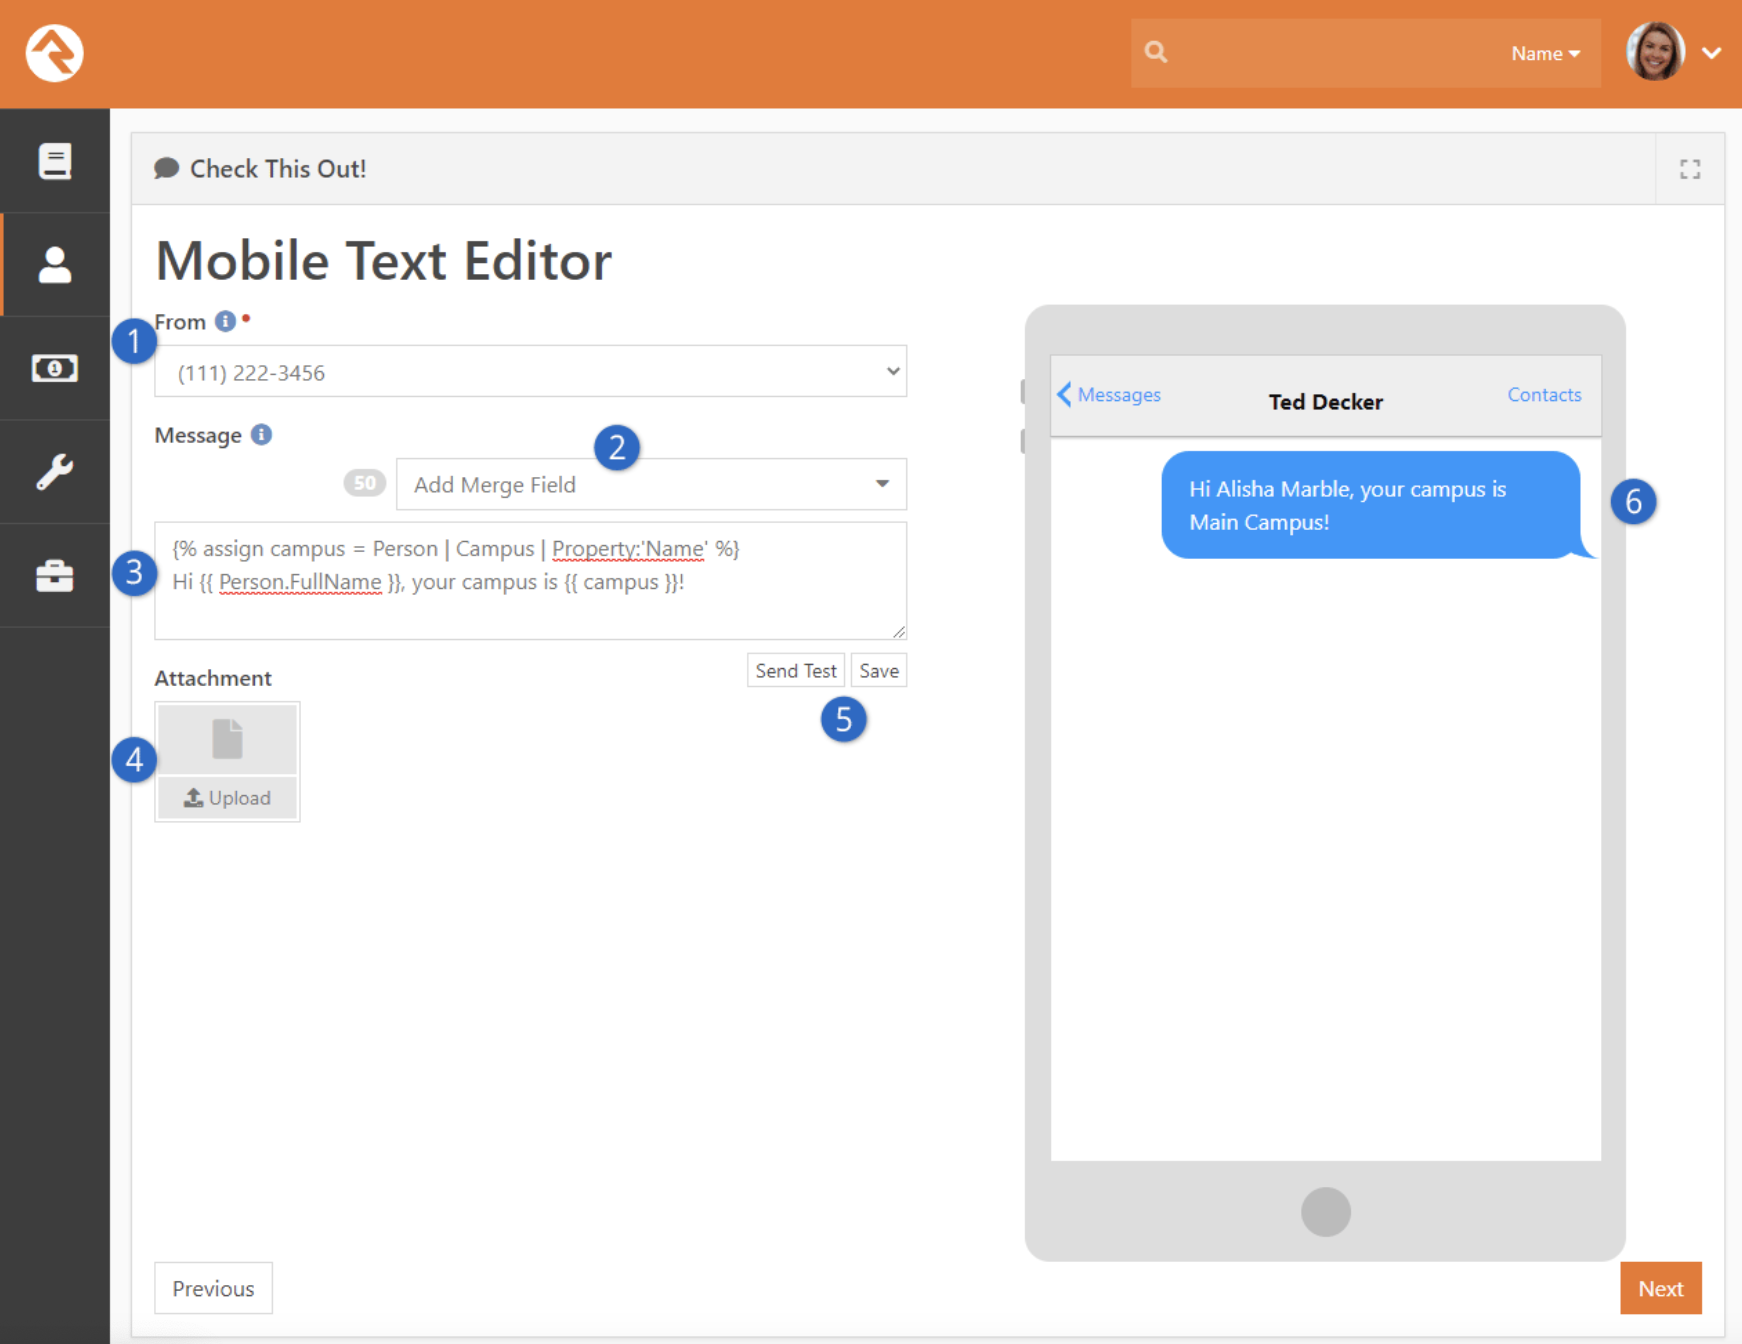
- From
- Select the SMS phone number from which the text message will be sent. Unless specified in the block’s settings, this list will contain all active SMS phone numbers you have configured.
- Add Merge Field
- Personalization has never been easier. Use the list here to populate your message with the Lava you’ll need to truly customize and personalize content for each recipient.
- Message Body
- This area is where you’ll compose the actual content of your message, including any Lava you might be using for personalization.
- Attachment
- You can use this to upload files that will be sent with the message as an attachment.
- Send Test / Save
- You can also send a test text to yourself by clicking the Send Test button. Click the Save button to save a draft of your text.
- Live Preview
- As you make changes to your Message Body you can see in real time how the message will appear when it’s received.
Sending EMAIL
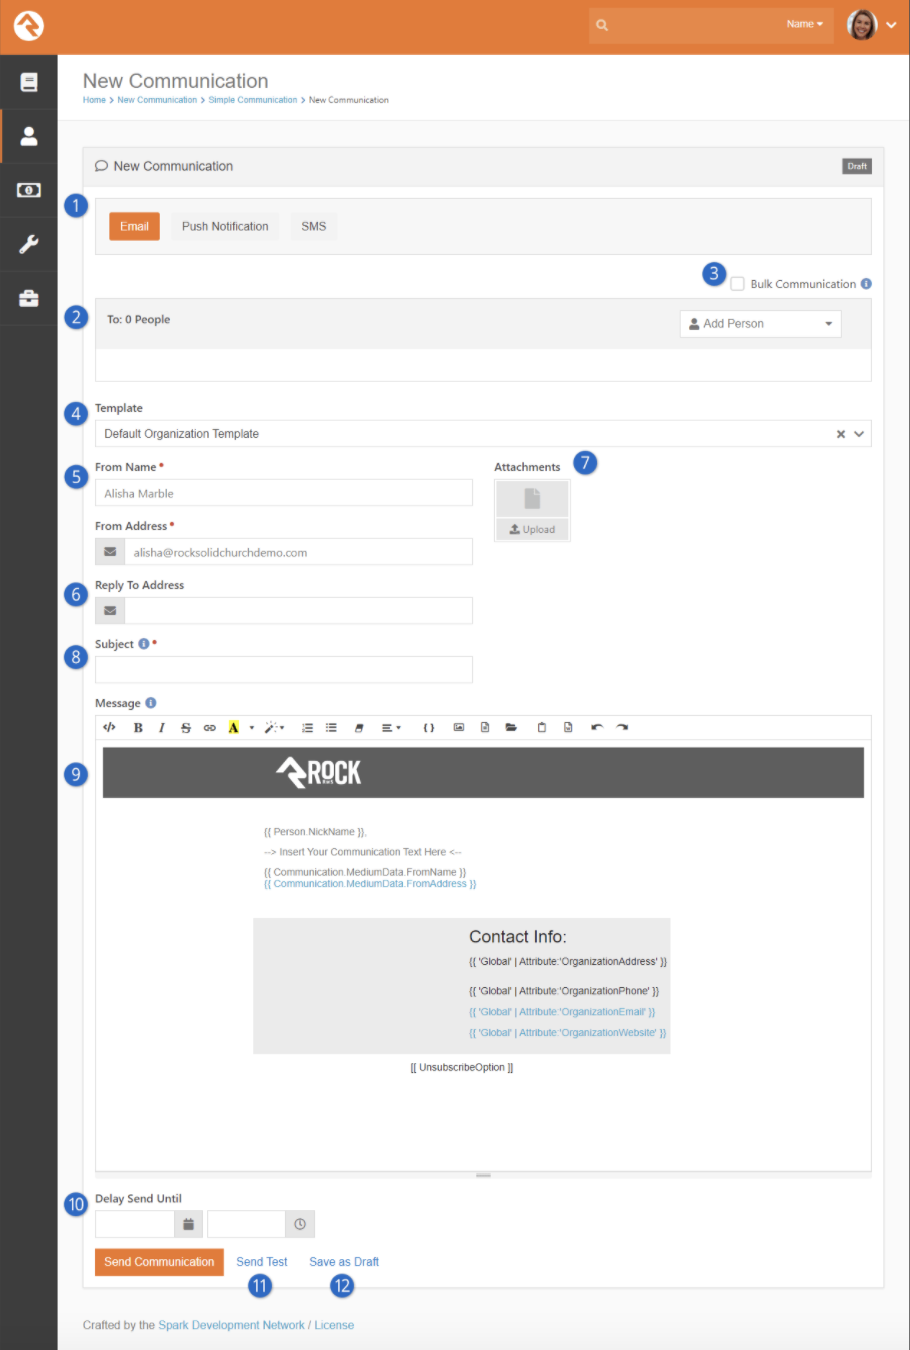
- Selector
- Email is the default communication medium, but this can be updated from the communication selector at the top of the page.
- Recipients
- The recipient list will be filled with all of the people you previously selected as recipients. You can also add and/or remove names from the list at this point. Don’t forget that if you started with a blank communication you’ll need to enter all of the names manually. You may notice that some names are in red. These names either do not have an email address or have been marked as not wanting emails or bulk emails.
- Bulk Option
- Determine if this message should be treated as a bulk email. Bulk emails will have the unsubscribe link added to them. They will also not be sent to people who have asked that they not receive bulk emails from your organization.
- Template
- If you would like to use a previously created email template you can select it here. For more information on creating templates see the Email Template Survival Guide. This page can be set with a default template. Out-of-the-box this will show your organization’s header and footer with the sender’s signature.
- From
- Fill in the email address that you would like the email to be sent from. By default, your contact information will be input, but you can change this as needed.
- Reply to Email
- You might want replies to go to a different address than the one you’re sending from. For example, when you send emails from the organization’s leader, you may want the replies to go to an administrative assistant.
- Attachments
- You can add any number of attachments you want to the email. Why limit a good thing?
- Subject
- Next, enter the subject of your email. A well-written subject can greatly increase the response rate of the email. Here are a few tips: provide context for the content of the message and a hint about the organization sending it. Remember to focus on catching the eye of the reader. You can use Lava merge fields in your subject line so by all means, be creative.
- The Message
- Now the fun part: your message. While you can enter any generic message in this box, consider personalizing your message using merge fields. The message editor has a button {} for selecting a merge field to add. Personalization is one of Rock’s main strengths so be sure to use it to its fullest.
- Delay Send
- If you’d like you can delay the sending of your message to a date and time in the future. What a timesaver!
- Test
- Before sending the email it’s wise to send a test. Using the Test button will send the contents of the email to the currently logged in user. The first recipient will be used to process any merge fields in the email.
- Draft
- Finally, you can send the communication or save it as a draft to be completed later. This draft will be available to complete from Tools > Communication History. Take the time to get it right!
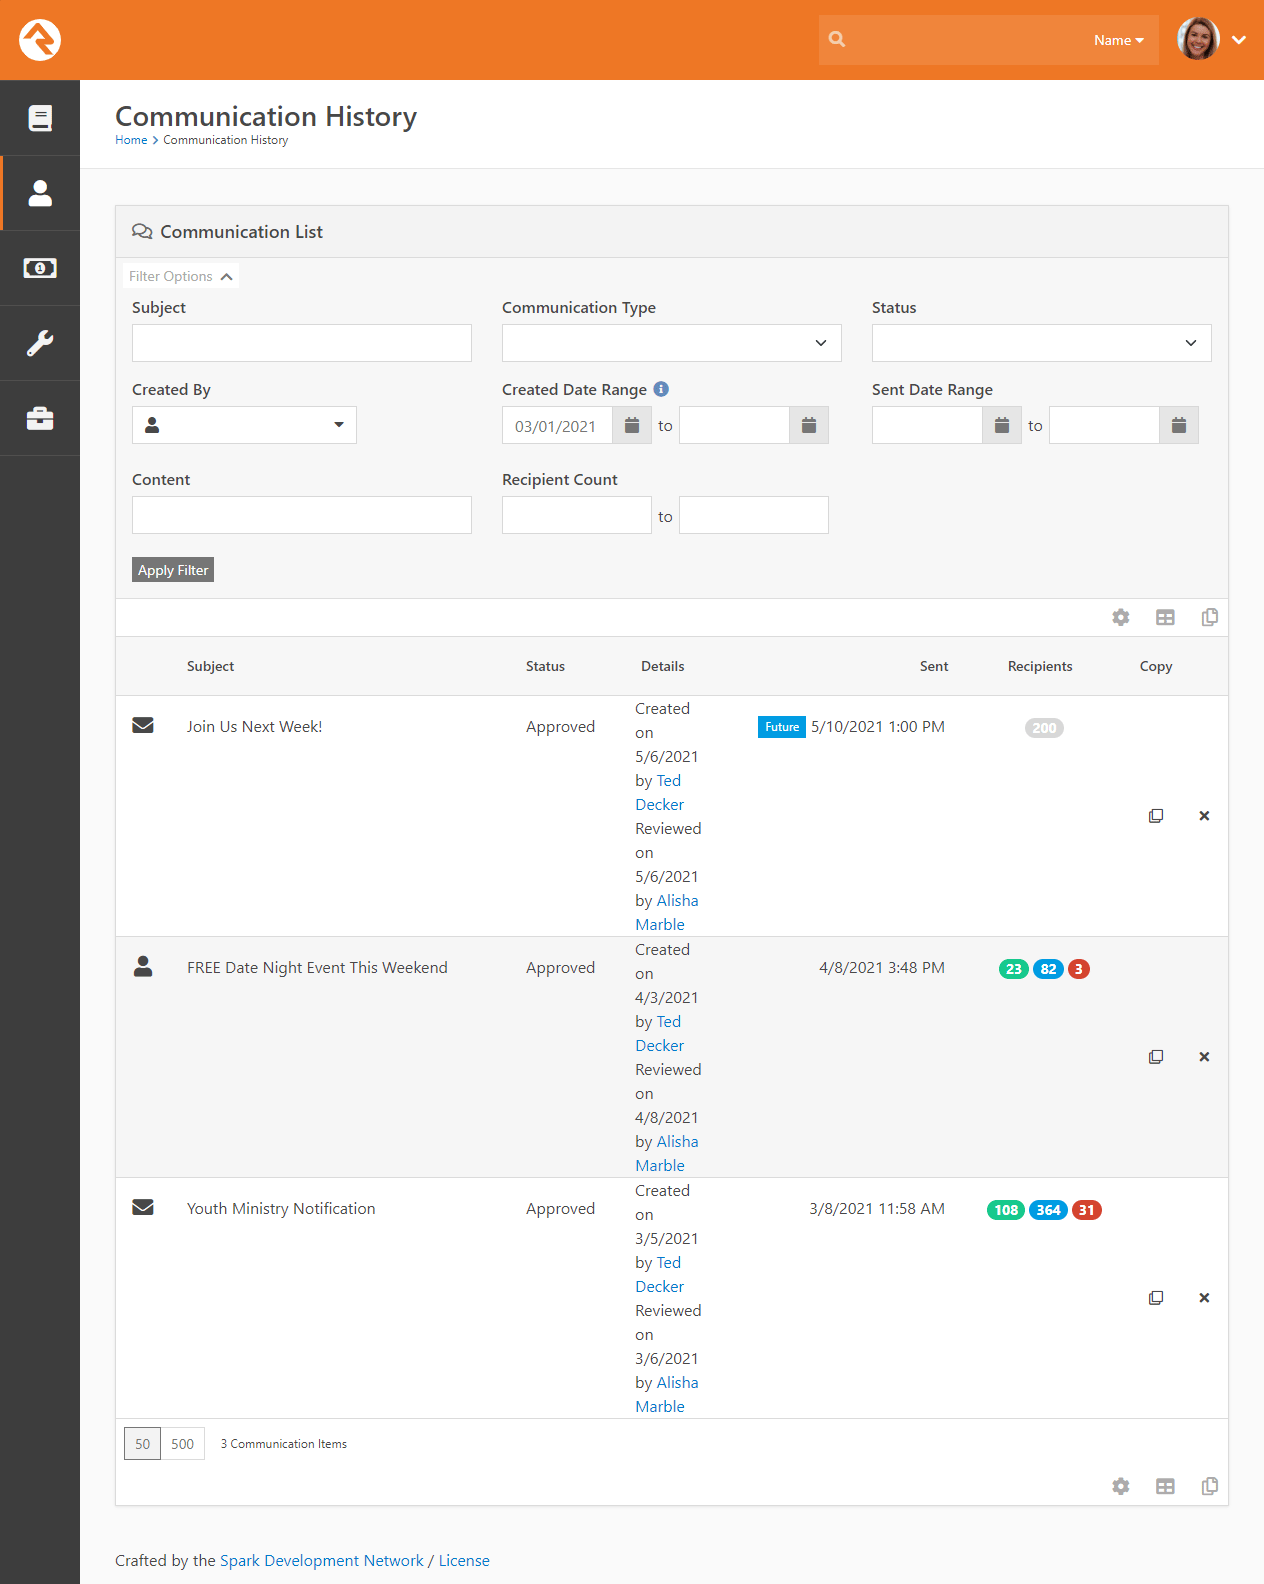
Communication History
You can view a history of the communications you’ve sent under People > Communication History. The list of communications can be filtered based on a variety of data elements, like type, status, content, etc.