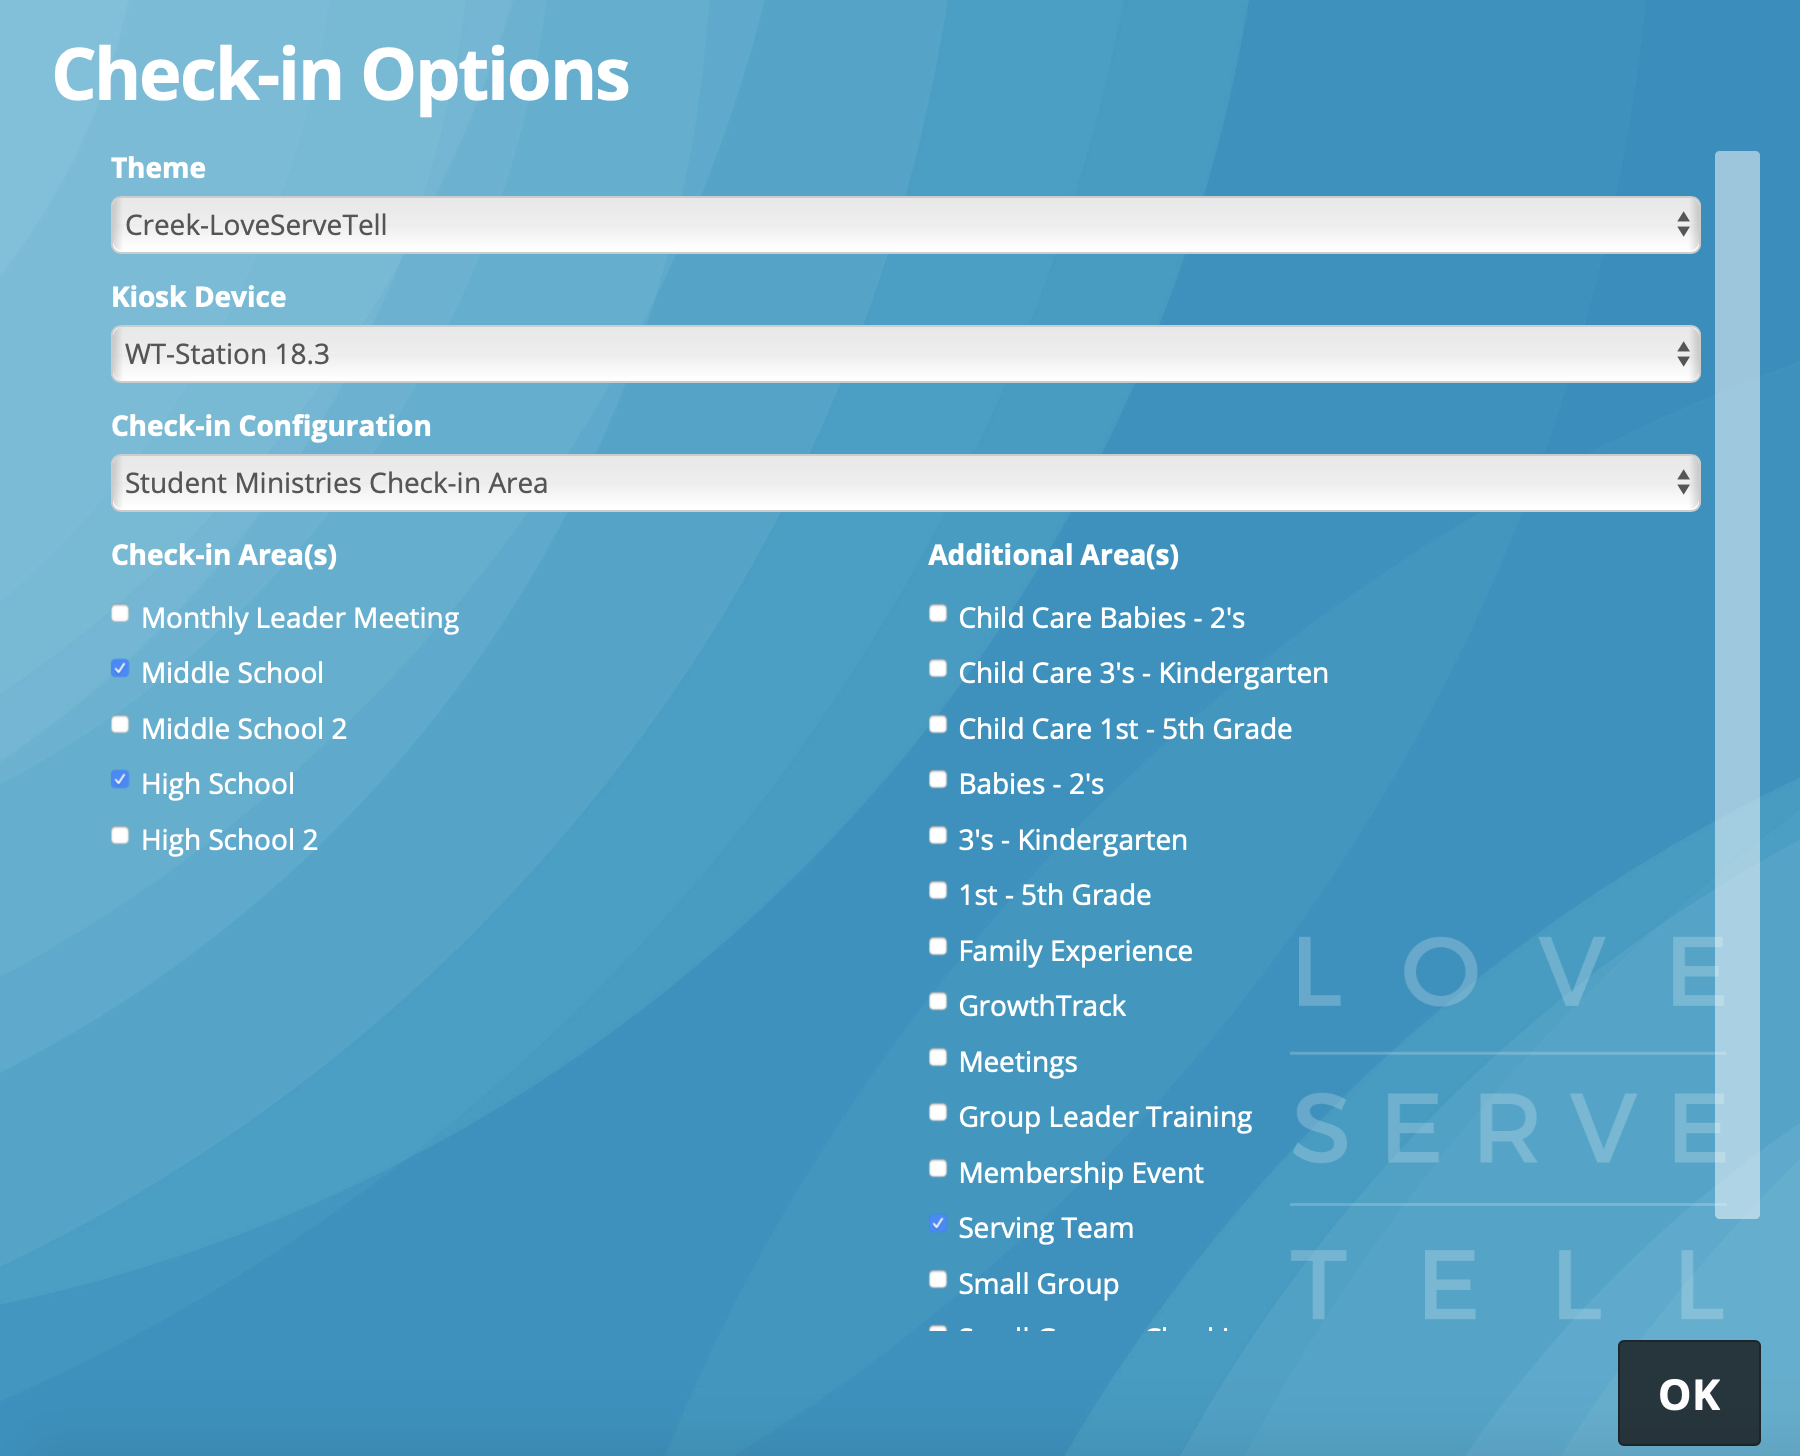
The Rock Checkin Configuration page is a power tool!
If you are not sure what the Rock Checkin Configuration page is there is a picture below.
There are a couple important notes on this page, but first let’s talk about how to get to this page.
This page loads before you can actually checkin on a machine.
You can find this page by going to: Rock.CedarCreek.tv/checkin on any computer, by opening the Rock Checkin App on an iPad or by Launching the Rock Application on any windows based checkin machine.
If you are already using the checkin module on an iPad, simply click the home button twice, find the Rock Checkin App and swipe up to ‘kill’ the app from running. The next time you click on the Rock Checkin App to open it, it will land on this configuration page as shown above.
If you are using a Windows based Checkin Application and are already using the application, simply tap 5 times in the top left corner of the screen in order to exit the application. The next time you click on the Rock Application to open it, it will land on this configuration page as shown above.
Lets take a second to talk about the power in this page:
- First Selection: Theme
- This gives us the ability to offer different background themes.
- For our setting please select: Creek: Adventure (updated in 2020)
- Second Selection: Kiosk Device
- This is VERY IMPORTANT. This selection tells the checkin application a lot of information. It is important to make sure that you select the machine you are currently on. If you are on a Windows bases Checkin Machine, your Kiosk Device number will be located on a label at the bottom of the touch screen. If you are on an iPad, the Kiosk Device number will be on a label on the back of the secure caseing.
- By selecting the correct device you control such things as:
- What printer the checkin device will use
- What options will be available for you to checkin to
- What time of day specific options are available to you
- What type of search and family options are available to you.
- If you are using your personal computer to operate checkin, please select [Campus]-Website Checkin
- Third Section: Checkin Configuration
- This selection gives gives you the ability to open specific sections, rosters, events for checkin.
- By Default Rock will suggest on the left column a list of items it recommends you activate with that configuration.
- Rock will however allow you to select any number of other checkin area from the right column as well.
- Fourth Section: Checkin Areas
- Think of this as FellowshipOne Checkin Codes
- This area gives you the ability to select one or more different checkin areas that you would like to allow guests or dream team members to checkin.
Here are some suggested configurations:
- Kids Ministry:
- Configuration: Kids Checkin Area
- Babies – 2’s
- 3’s – Kindergarten
- 1st – 5th Grade
- Serving Team
- Configuration: Kids Checkin Area
- Student Ministries:
- Configuration: Student Ministries Check-in Area
- Middle School
- High School
- Serving Team
- Configuration: Student Ministries Check-in Area
- Next Steps:
- Configuration: Growth Track Check-in Area
- Growth Track
- Configuration: Next Steps Check-in Area
- Group Leader Training
- Configuration: Growth Track Check-in Area
- First Impressions:
- Configuration: Volunteer Check-in
- Serving Team
- Configuration: Volunteer Check-in
- Child Care:
- Configuration: Child Care Check-in Area
- Child Care Babies – 2’s
- Child Care 3’s – Kindergarten
- Child Care 1st – 5th Grade
- Configuration: Child Care Check-in Area
There are 10s of other options specifically when it comes to special events, but those are typically instructed during the time of the event.
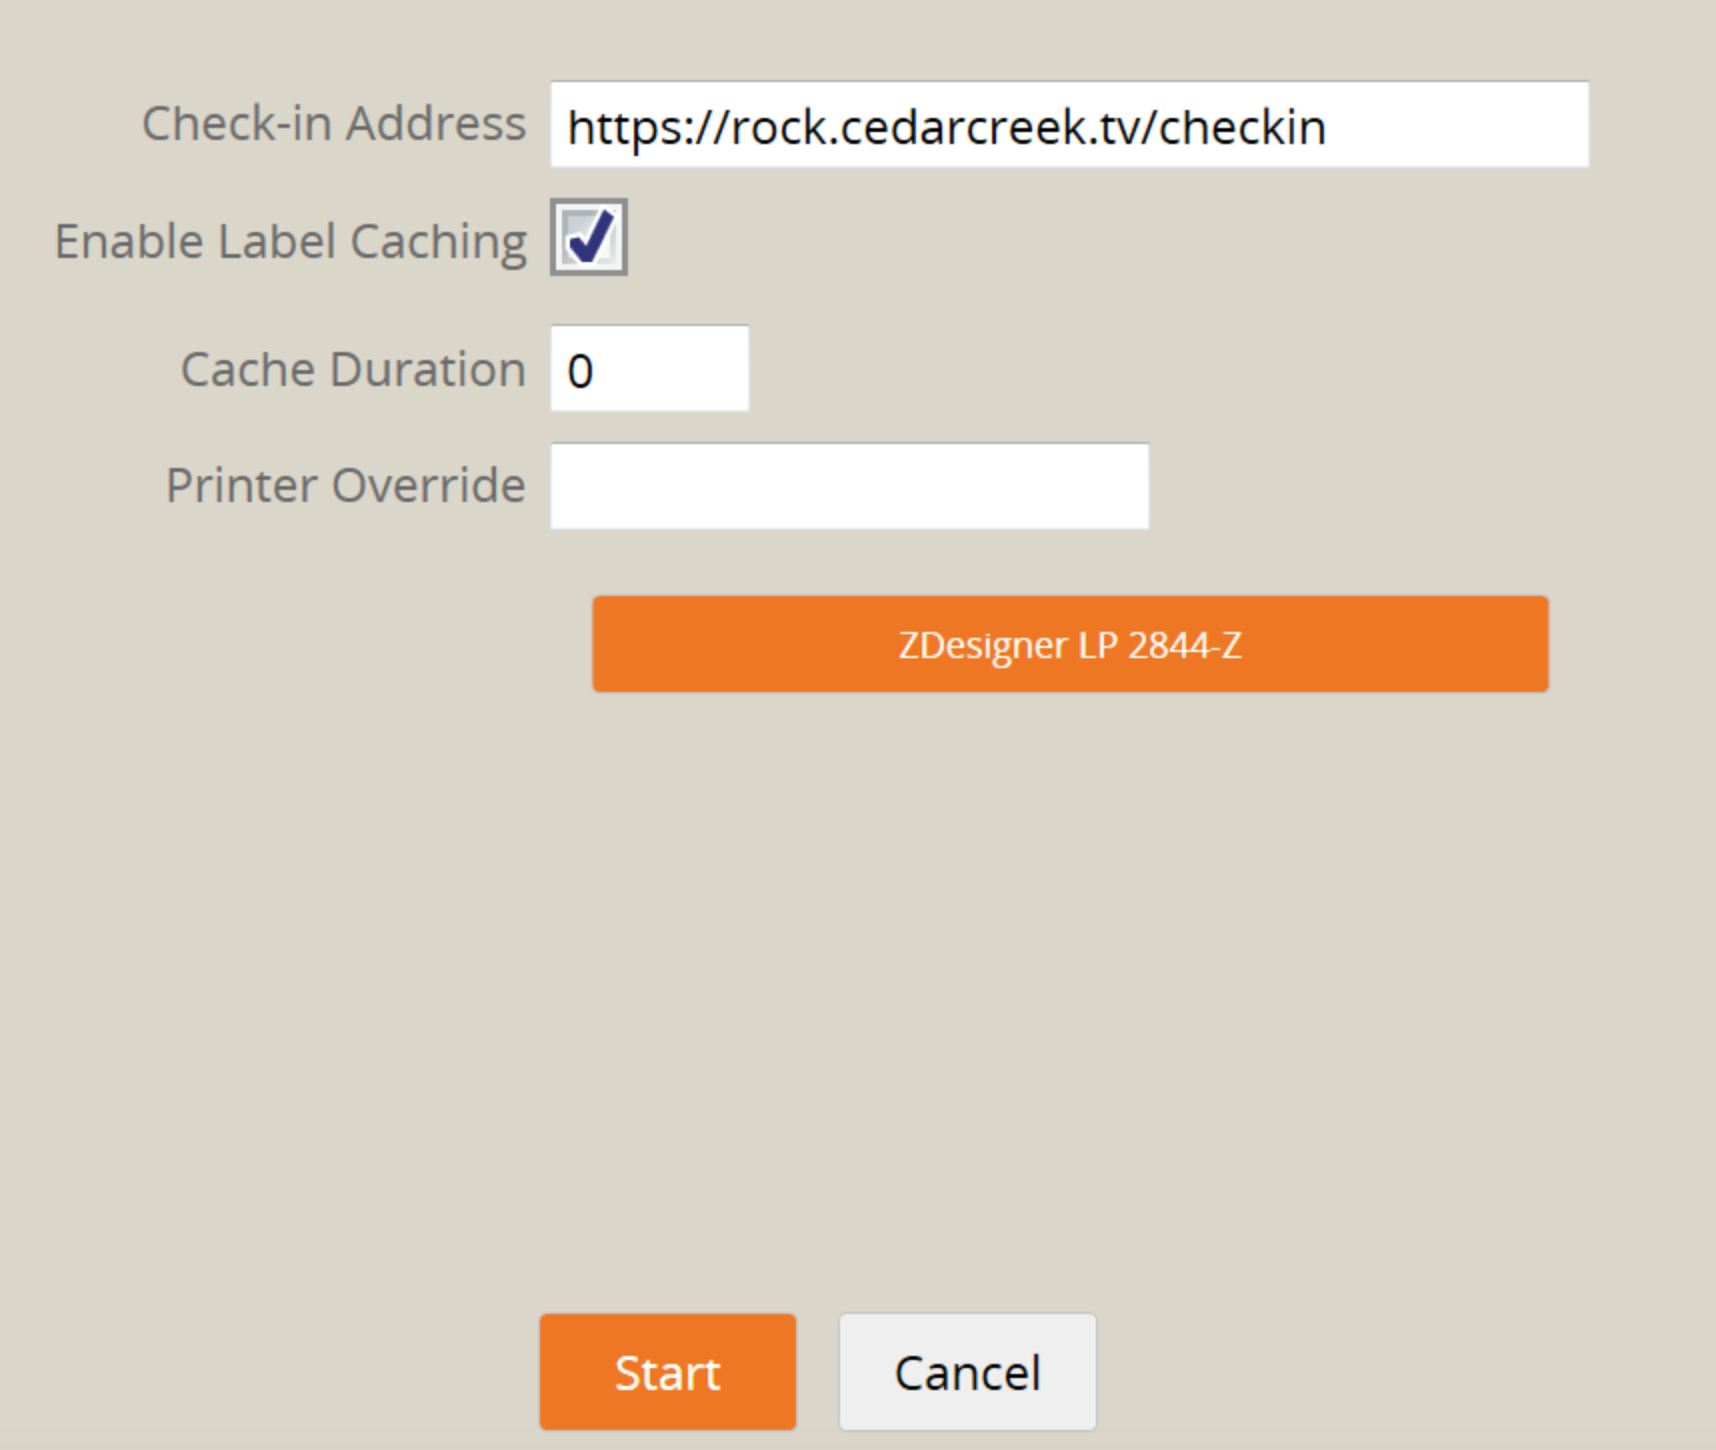
Lastly if you are using a Windows based machine, you have most likely encountered another type of ‘configuration’ screen. This screen is unique to the windows application and gives you the opportunity to confirm two things.
- Website: https://Rock.CedarCreek.tv/checkin
- Printer – Your printer must be selected (orange)
See picture below