Need Assistance? Submit a ticket HERE
1.) Power on the AV rack by using the button. Be sure to turn this switch off when finished. 2.) Turn on the TV by using the remote that looks like this 3.) Using the video switcher, switch the source by pressing the button labeled ‘COMP’. Open Propresenter, and selected content should play on screen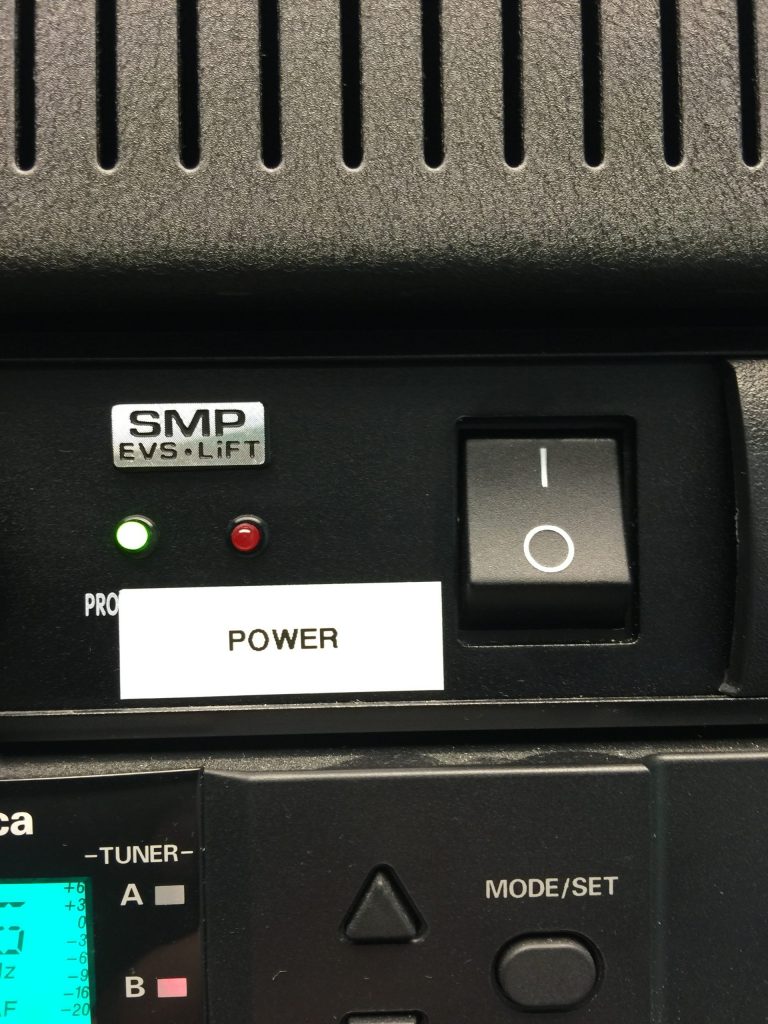
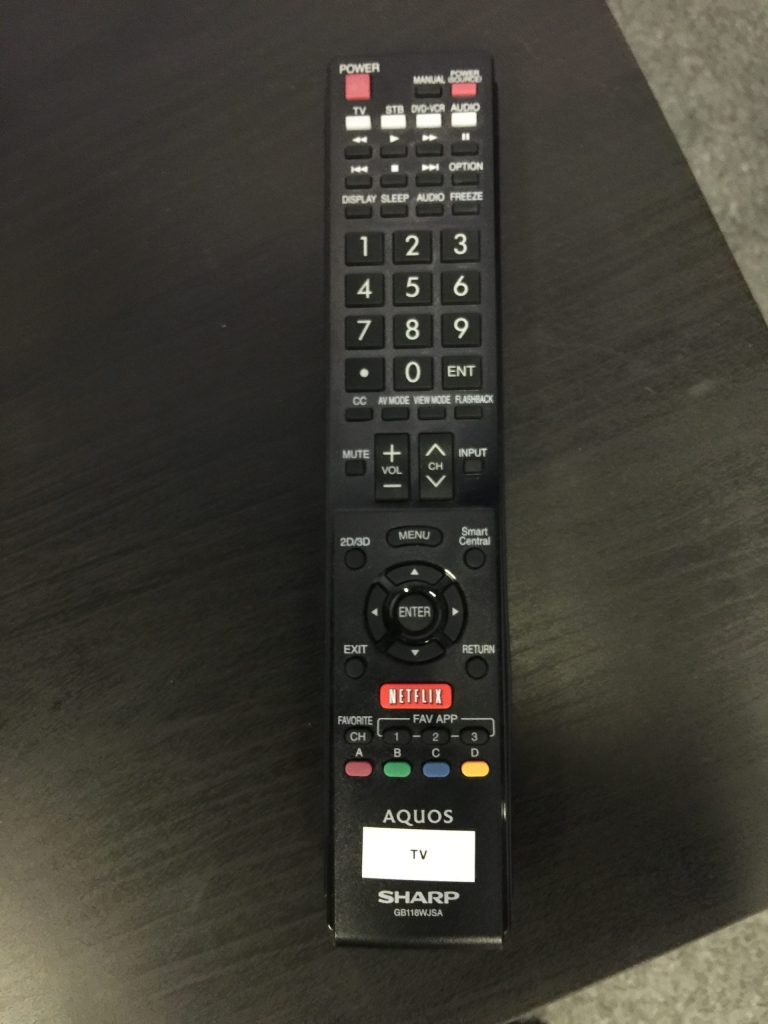
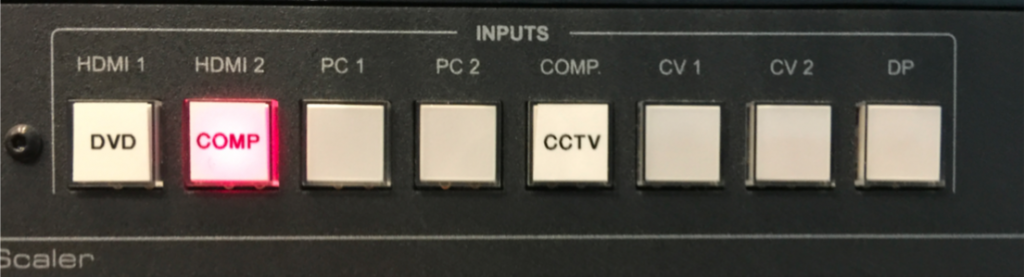
1.) Power on the AV rack by using the button. Be sure to turn this switch off when finished. 2.) Turn on the TV by using the remote that looks like this 3.) Using the video switcher, switch the source by pressing the button labeled ‘COMP’. On the top bar of the computer screen, click the small TV icon. A drop down will appear and click ‘Mirror Displays.’ You should now see what you are doing on the computer, being displayed on the screen.
1.) Power on the AV rack by using the button. Be sure to turn this switch off when finished. 2.) Use the knobs to adjust appropriate source of audio. Make sure the master is set at the level labeled ‘0’. Be sure to power on the desired microphone via the microphone.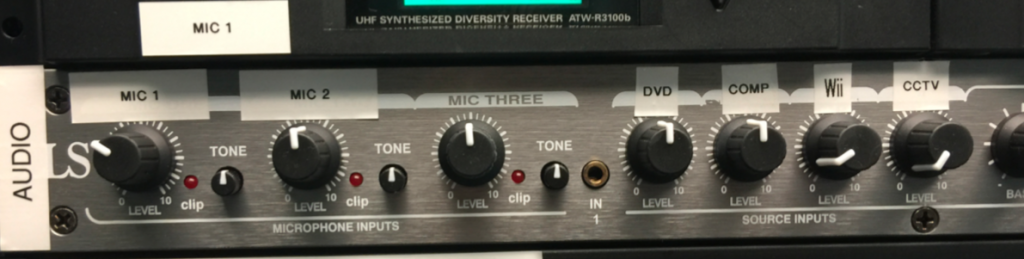
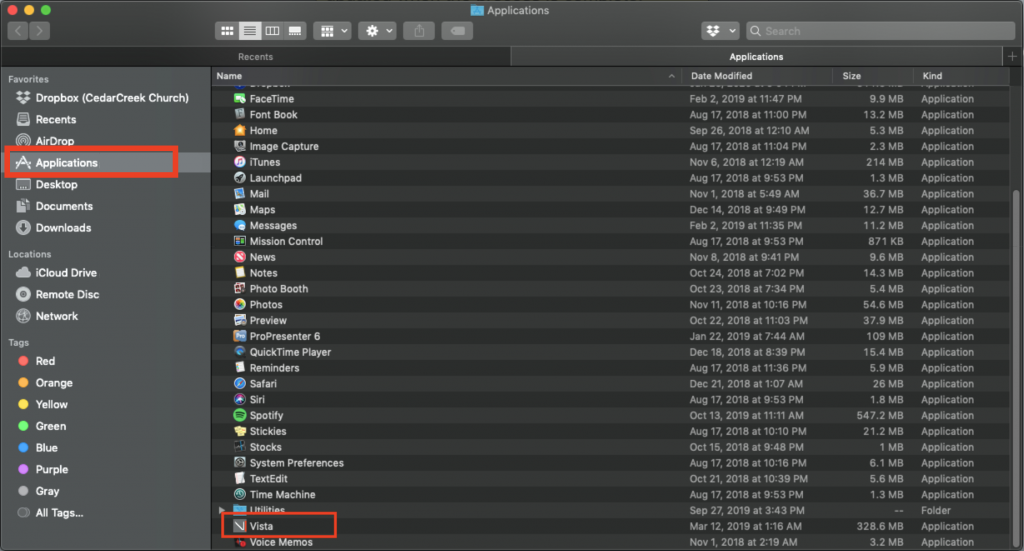
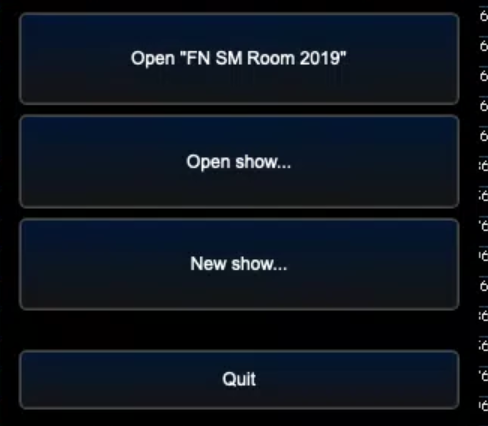
1.) Click the Vista icon located on the dock 2.) If the ‘Vista’ program is not there, Click ‘Finder’ on the bottom left corner of the dock 3.) Click ‘Applications’ and scroll till the bottom until you see a program called ‘Vista’. Double click to open. 4.) Once the program opens, click ‘Open FN SM Room 2019’ 5.) Use the controller to select the desired scenes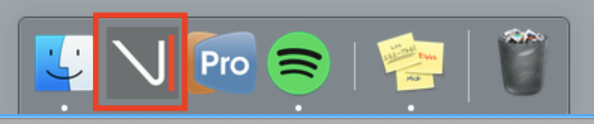
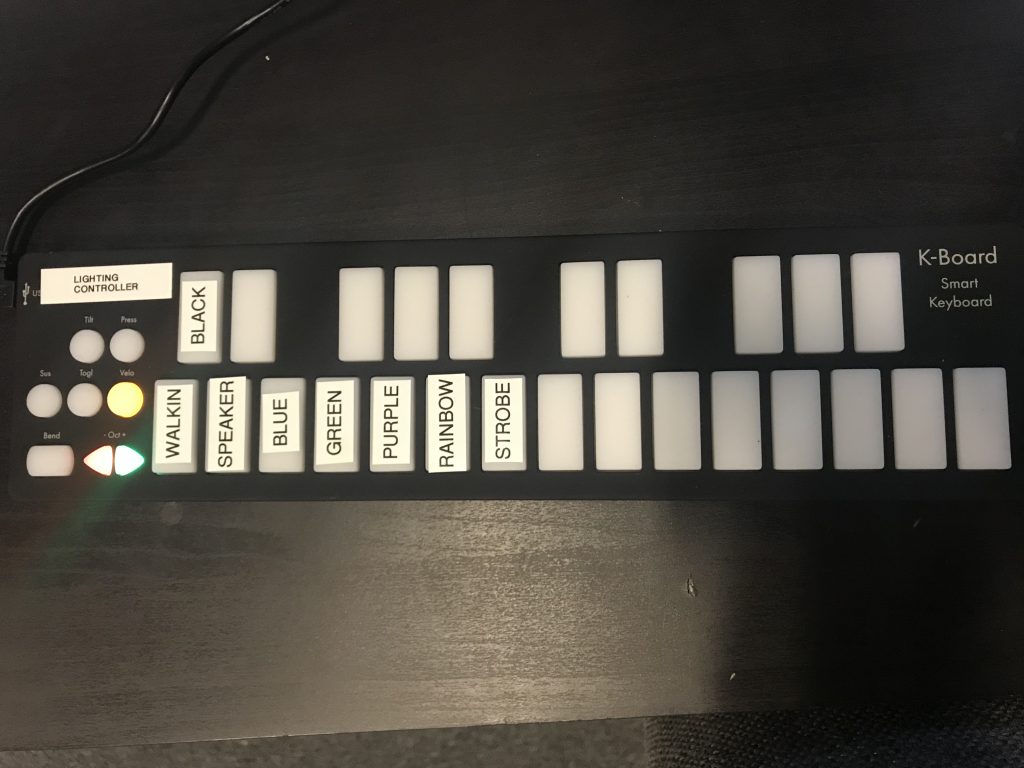
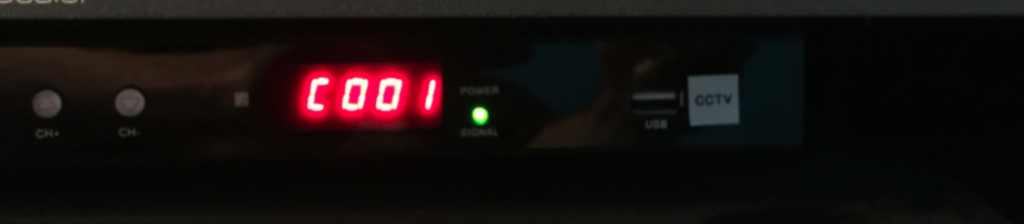
1.) If the labels happened to fall off of the lighting controller, below is which buttons trigger which scenes. 1.) Power on the AV rack by using the button. Be sure to turn this switch off when finished. 2.) Turn on the box labeled ‘CCTV’ (If not already on) 3.) Using the video switcher, switch the source by pressing the button labeled ‘CCTV’. Be sure to switch it back to ‘COMP’ when finished 4.) Use the knobs to adjust appropriate source of audio. Make sure the master is set at the level labeled ‘0’.
1.) Power on the AV rack by using the button. Be sure to turn this switch off when finished. 2.) Turn on the TV by using the remote that looks like this 3.) Turn on the DVD player (IF not already on) 4.) Using the video switcher, switch the source by pressing the button labeled ‘DVD’. Be sure to switch this back to’COMP’ when finished 5.) Use the knobs to adjust appropriate source of audio. Make sure the master is set at the level labeled ‘0’.