Set up email on new device
We use Office 365 hosted email. You can follow the instructions in the sections below to connect your devices (computers and phones/tablets) to the server. Here are the recommended steps for various scenarios.
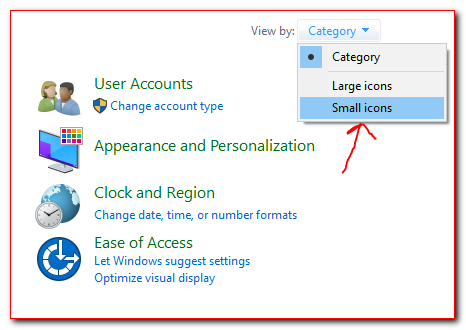
2) If your view is set to “Category” at the top right, drop that down to “Small Icons”
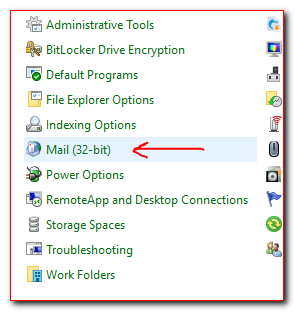
3) Click on “Mail (32-bit)” to open those settings.
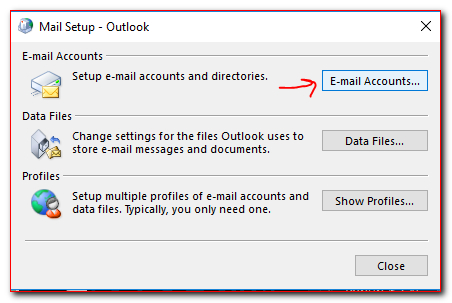
4) Cilck on “Email Accounts” on the new pop-up window for Outlook.
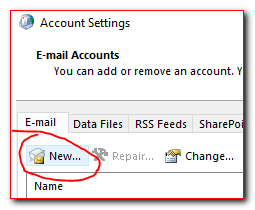
5) Click on “New…” on the Email Tab.
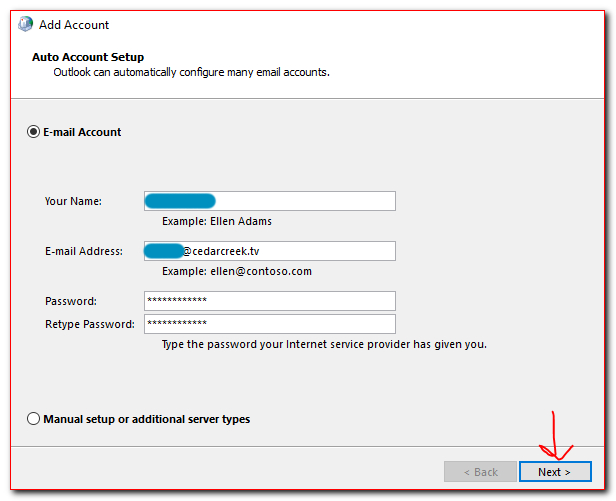
6) Enter your name and email address. If this is not a church owned PC you are signing into, you may also be asked to add your password here.
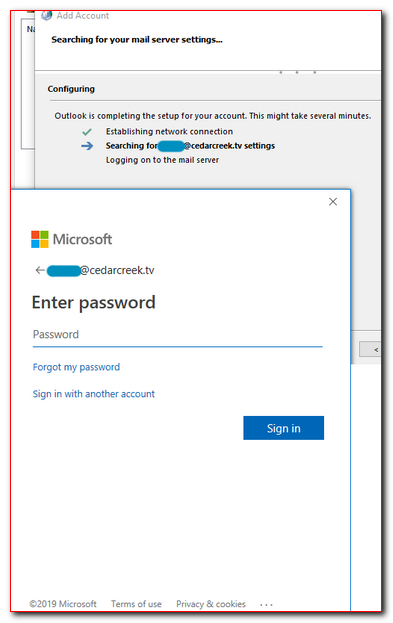
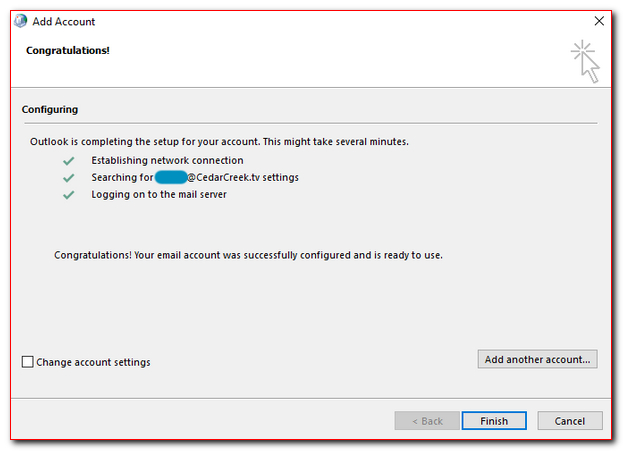
7) The system will find your email address and server settings automatically and show a few green checks. Again, if you are signing into a non-church owned PC, you may also have to enter your password during this process again, this time in a Microsoft prompt.
8) When cleared, you will be shown all green checks and can click “Finish”
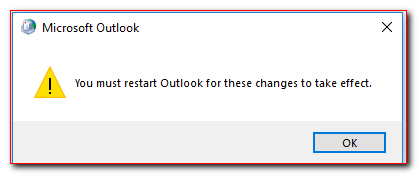
9) If you had Outlook open during this setup in the background, you may be prompted saying you need to close and re-open it. Do so if you see this.
10) Once you open Outlook, you will see a message at the bottom right saying it is Connected to Microsoft Exchange and that it is updating. Once complete, it should say “All folders are up to date.”


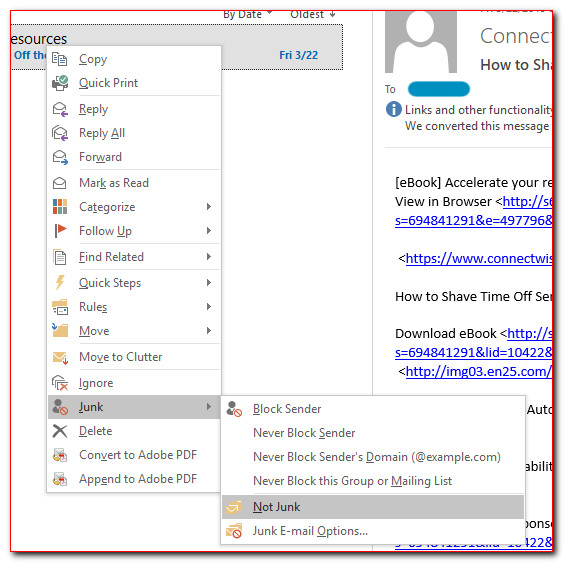
Outlook is done! That was easy! Next we’ll look at webmail, but before we do that, you’ll want to make a note to check the “Junk” folder often. This is where our spam filter will be placing things it flags. You can right click items it places there and say something is not junk, change your filter settings, or choose to unblock senders.
If you haven’t yet configured webmail, now is the time! Even if you don’t plan on using it, it only takes a few seconds to set it up properly for future use in an emergency. Webmail is accessed by going to https://outlook.office365.com. You can bookmark that link.
11) Go to https://outlook.office365.com and sign in with your creek email and password.
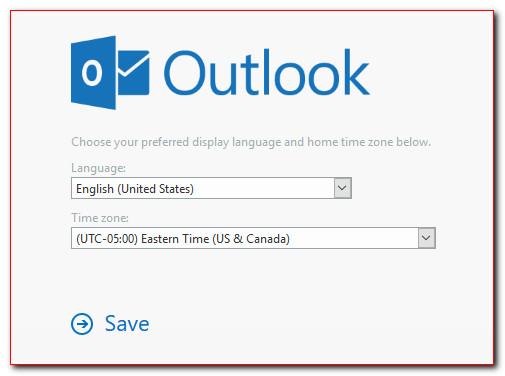
12) Once logged in you have to set your timezone, choose “UTC -05:00 Eastern Time” from the drop down and click “Save”
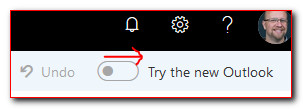
13) Until they make it permanent, you will be prompted to try the new Outlook. Turn that on by clicking the “try the new outlook” button on the pop-up or by sliding the slider at the top right corner on.
This will reload the window and after a second, show a “Welcome” pop up that you can also close.
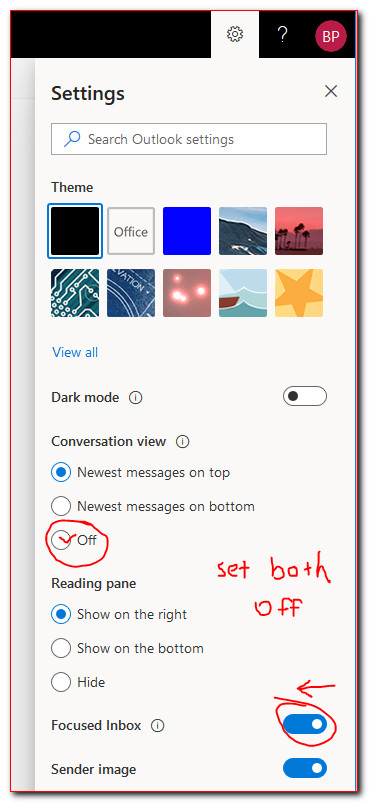
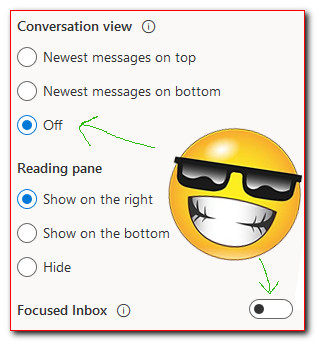
14) Click the Settings gear icon at the top right and turn off both “Conversation View” and “Focused Inbox” if you don’t want to use those. Most people prefer not to use these. Conversation view lumps all Inbox/Sent/Deleted items in a thread of emails regarding a conversation vs keeping them in their own folders. Focused Inbox lets Microsoft decide what emails are important and puts them in their own tab and hides the rest in a different tab. You can use these settings if you prefer, but most people will want these disabled.
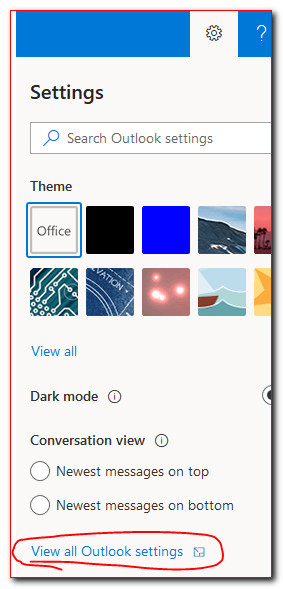
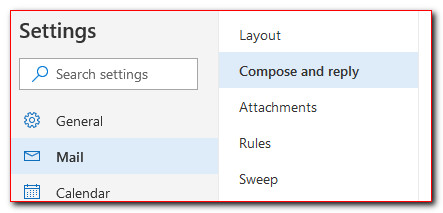
15) Further down you will see “View All Outlook Settings” and you can click that to customize your experience.
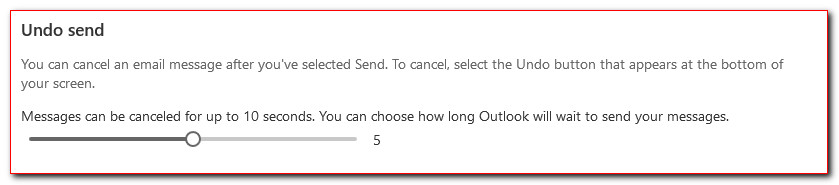
16) In the “Mail – Compose and reply” section you can set your email signature for webmail among other settings. One neat feature that only applies when using the webmail, is a “delayed send” option. You can set this slider to give yourself an extra 5-10 seconds after hitting send to “undo” the action and fix a mistake (like if you forgot an attachment or didn’t mean to send it yet).
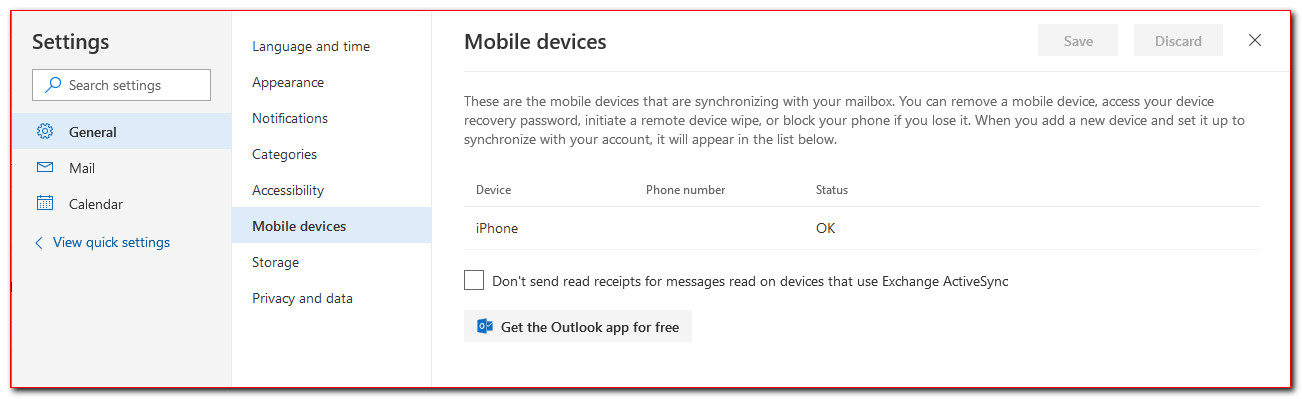
17) You’ll notice in the “General – Mobile devices” section that you have phones or tablets listed. If you are changing devices and still see your old one listed here, feel free to remove it. We need to add your new device too, so check out the section regarding your devices below after we finish here. But this is where you can remove devices from your account after you sell them or see which devices have access to your email. There is a hard cap of 100 devices per email account, so you likely won’t run out of space to add a new phone any time soon, but keeping access restricted from devices you no longer have, is always a good idea.
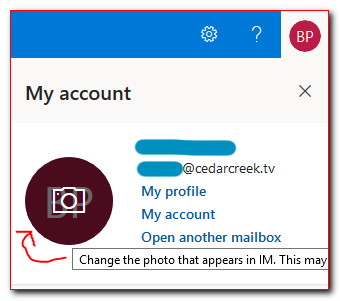
18) The last thing we are asking users to do is to upload a photo of themselves if one isn’t already in the system. If you don’t have one, you will see your initials at the top right instead of a photo. If you see a photo, you can skip this step, but if not, click your initials on the top right corner, click the larger picture of your initials in the pop-up, and upload a photo of yourself. This will show up in emails we send to others as well.
Now you have Outlook and Webmail all configured. All that’s left to do is your phone/tablet devices. See those sections below.
As an aside: If you use the native Mac OS Mail program to check your email and wish to continue doing so, you can go to the “Mail – Accounts” menu and add it by choosing “Exchange” on the right and entering your information. After adding, you may have to fully close and re-open the Mail app for it to connect. It will not tell you to do this, but you may have to do so for it to work.
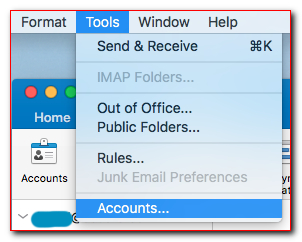
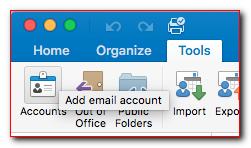
1) Open Outlook on your Mac. If you do not have any email accounts configured, it should open a walk-through to add an account. If this is the case, skip to step 3. If it doesn’t open a walk-through, or if you already have a different email account in Outlook, click on the “Tools” menu at the top and on the “Accounts…” option, or alternatively you can click on the “Tools” tab and on the “Accounts” button.
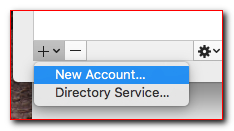
2) Click on the plus sign at the bottom left of the Accounts window and choose “New Account…”
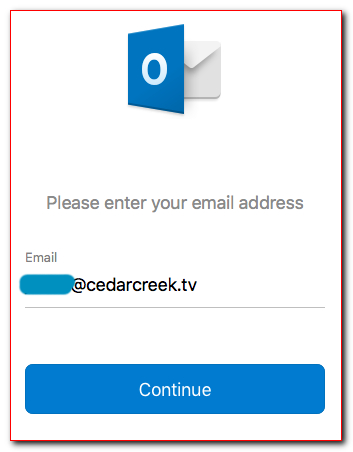
3) Enter your email address and press “Continue” and it will auto-find your server settings.
4) Now you will see a Microsoft Login screen asking for the password. Enter it again here and press “Sign In” to continue.
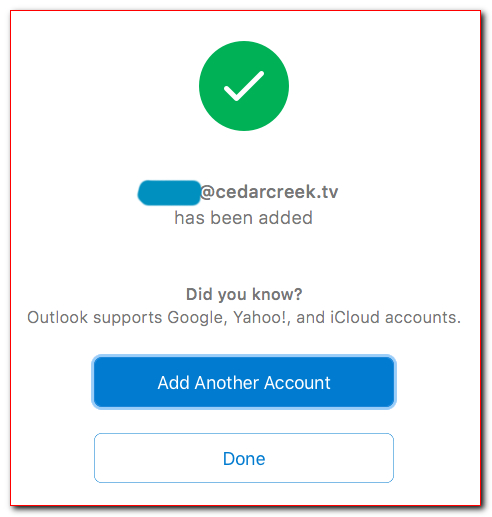
5) If all goes well you should see a giant green check confirming your success. Click “Done” to use your email.
6) Depending on the size of your mailbox, it may take a bit to sync. You will see a message at the bottom right saying it is Connected to Microsoft Exchange and that it is updating. Once complete, it should say “All folders are up to date.”
Outlook is done! That was easy! Next we’ll look at webmail, but before we do that, you’ll want to make a note to check the “Junk” folder often. This is where our spam filter will be placing things it flags. You can right click items it places there and say something is not junk, change your filter settings, or choose to unblock senders.
If you haven’t yet configured webmail, now is the time! Even if you don’t plan on using it, it only takes a few seconds to set it up properly for future use in an emergency. Webmail is accessed by going to https://outlook.office365.com. You can bookmark that link.
7) Go to https://outlook.office365.com and sign in with your creek email and password.
8) Once logged in you have to set your timezone, choose “UTC -05:00 Eastern Time” from the drop down and click “Save”
9) Until they make it permanent, you will be prompted to try the new Outlook. Turn that on by clicking the “try the new outlook” button on the pop-up or by sliding the slider at the top right corner on.
This will reload the window and after a second, show a “Welcome” pop up that you can also close.
10) Click the Settings gear icon at the top right and turn off both “Conversation View” and “Focused Inbox” if you don’t want to use those. Most people prefer not to use these. Conversation view lumps all Inbox/Sent/Deleted items in a thread of emails regarding a conversation vs keeping them in their own folders. Focused Inbox lets Microsoft decide what emails are important and puts them in their own tab and hides the rest in a different tab. You can use these settings if you prefer, but most people will want these disabled.
11) Further down you will see “View All Outlook Settings” and you can click that to customize your experience.
12) In the “Mail – Compose and reply” section you can set your email signature for webmail among other settings. One neat feature that only applies when using the webmail, is a “delayed send” option. You can set this slider to give yourself an extra 5-10 seconds after hitting send to “undo” the action and fix a mistake (like if you forgot an attachment or didn’t mean to send it yet).
13) You’ll notice in the “General – Mobile devices” section that you have phones or tablets listed. If you are changing devices and still see your old one listed here, feel free to remove it. We need to add your new device too, so check out the section regarding your devices below after we finish here. But this is where you can remove devices from your account after you sell them or see which devices have access to your email. There is a hard cap of 100 devices per email account, so you likely won’t run out of space to add a new phone any time soon, but keeping access restricted from devices you no longer have, is always a good idea.
14) The last thing we are asking users to do is to upload a photo of themselves if one isn’t already in the system. If you don’t have one, you will see your initials at the top right instead of a photo. If you see a photo, you can skip this step, but if not, click your initials on the top right corner, click the larger picture of your initials in the pop-up, and upload a photo of yourself. This will show up in emails we send to others as well.
Now you have Outlook and Webmail all configured. All that’s left to do is your phone/tablet devices. See those sections below.
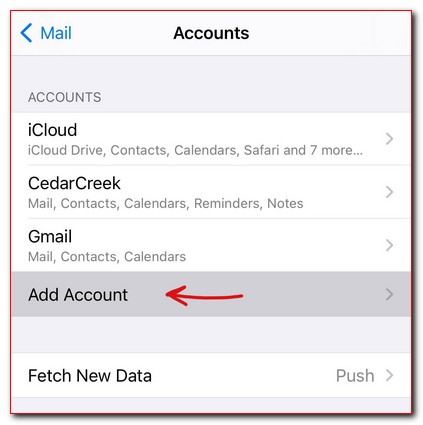
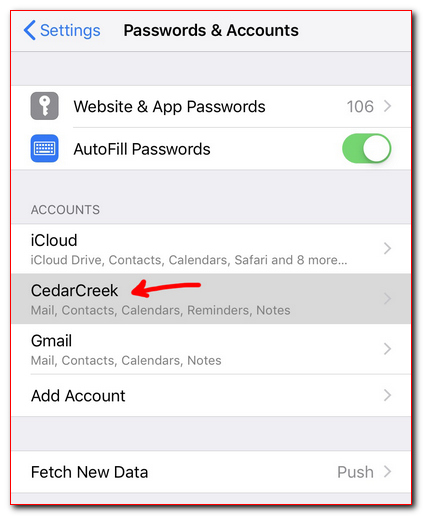
– iOS 13 and 12 users should go to “Settings – Passwords & Accounts”
– iOS 11 users should go to “Settings – Accounts and Passwords”
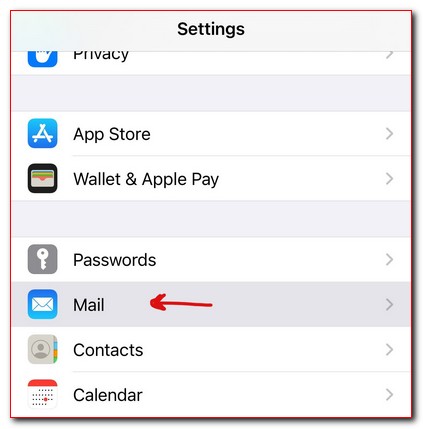
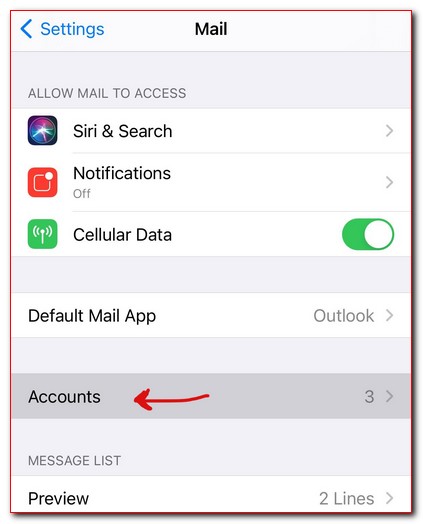
– iOS 10 users should go to “Settings – Mail – Accounts”
– iOS 9 and below, should go to “Settings – Mail, Contacts, Calendars”
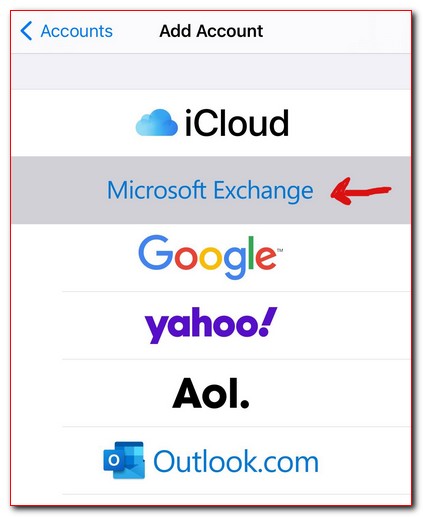
2) Click on “Add Account” and then choose “Exchange” as the type.
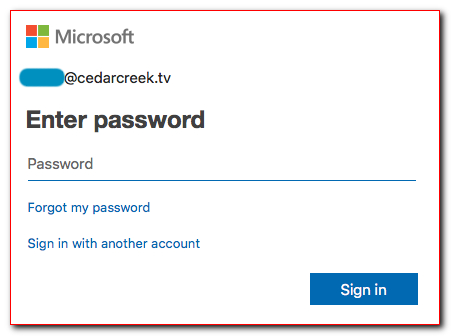
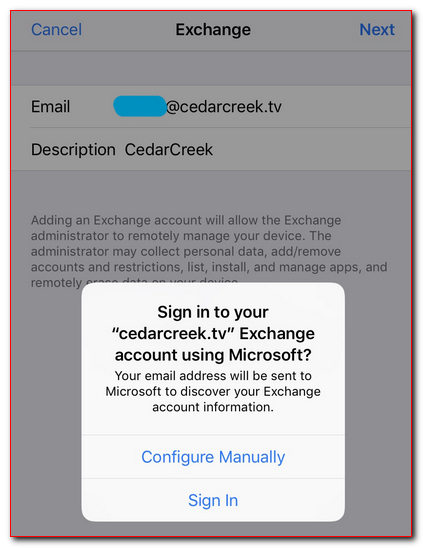
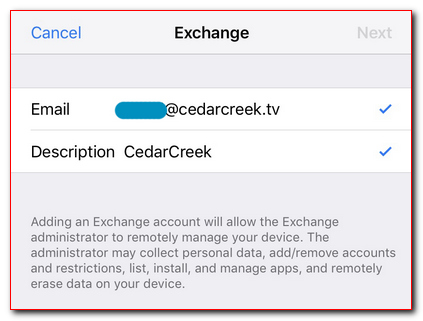
3) Enter your email address and either keep the default description of “Exchange” or change it to something more descriptive like “CedarCreek” if you desire and press Next at the top right. It will ask you to sign in, so click “Sign In” to proceed.
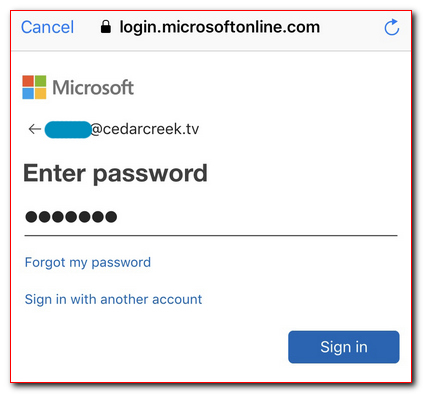
4) Enter your email password on the newly opened Microsoft login window and press “Sign in” to continue. If correct, it will redirect back to the previous screen, show some check marks by the email and description, and move to the next screen automatically.
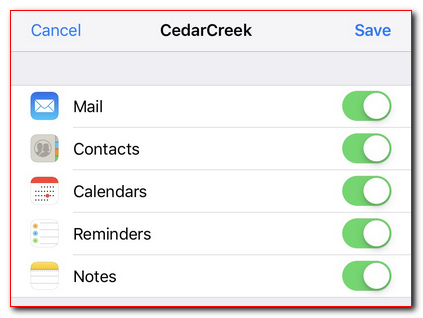
5) Choose what you want to sync to this device (default is all items) and press “Save” at the top right.
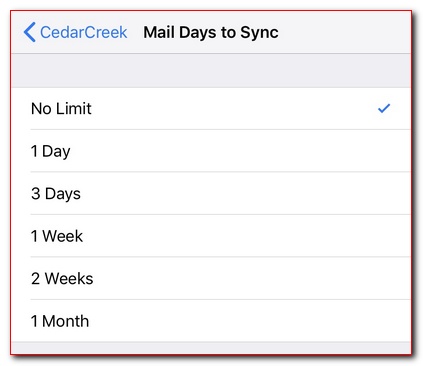
6) Now by default it doesn’t sync email more than a month old. You may want to adjust that. Phones have a lot of storage these days, so let’s fix this. Click on the newly created Account in the list.
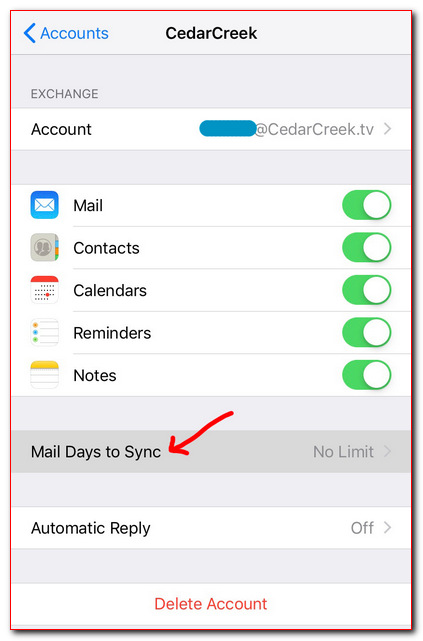
7) Choose the “Mail Days to Sync” field and set it to “No Limit” and then click the account name at the top left to go back out of the settings area.
Open up your email and it should be syncing. If you have a lot of email, it may take 30min or more to sync. Microsoft throttles how much syncing happens at a time, so items may come in slowly and you may even see “disconnected” or “not connected” errors while they throttle your sync. After this initial sync, it should clear up and work normally.
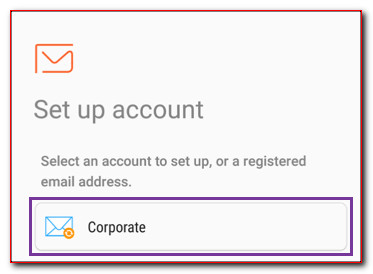
2) At the bottom, choose the “Add Account” button
3) Tap “Corporate” or “Microsoft Exchange ActiveSync” (depending on your version you may see either one)
4) Enter your Email address and Password. At this point you may be asked to enter your details manually:
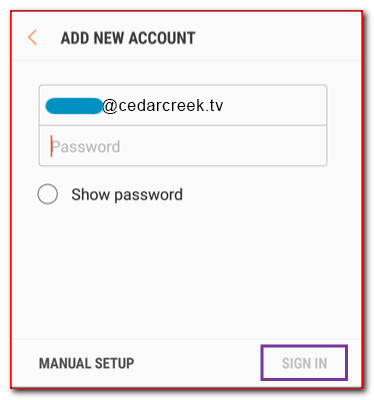
- Username = your full email address
- Password = your email password
- Server = outlook.office365.com
- Domain = leave this blank
- If Domain and Username are separate fields, enter your full email address in Username, and leave Domain blank.
- If you see a Domain\Username field, enter your full email address only. Some devices put a \ in front of that automatically, and that’s ok.
(example: \FirstL@cedarcreek.tv)
Note: If this is your first time setting up an email account, you may be asked to accept the Privacy Policy and Allow email to make and manage phone calls.
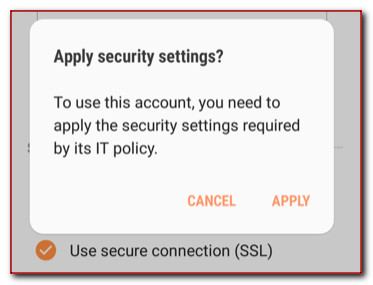
5) Tap Next to complete the setup. If asked to apply the security settings, click Apply.
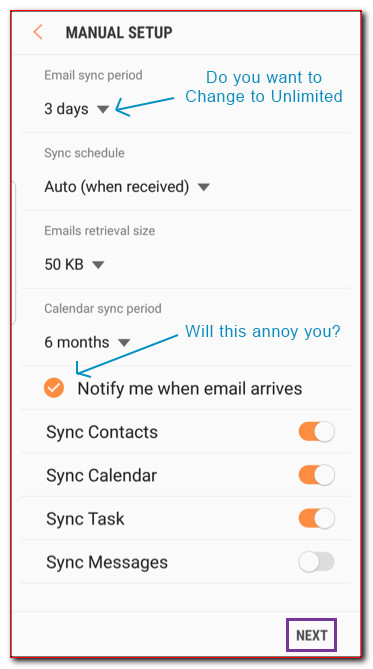
6) Now set your options. You may want to change the default “Email Sync Period” from 3 days to Unlimited and you may want to disable the “Notify me when email arrives” option unless you want your device to play an alert sound every time you get an email. Then tap Next when done.
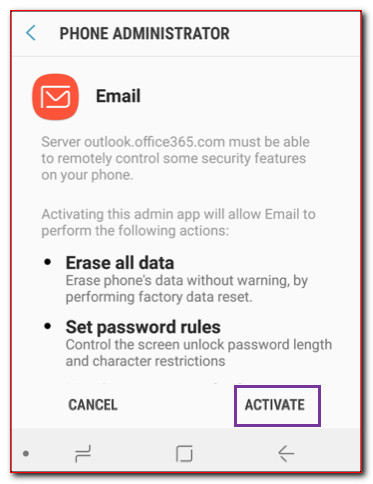
7) Tap Activate if prompted to allow the server to control the device as needed.
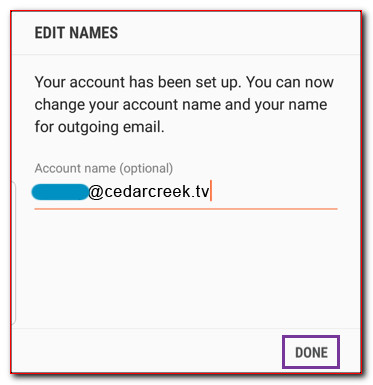
8) Confirm or edit the Account Name you’d like to call this on your device and click Done.
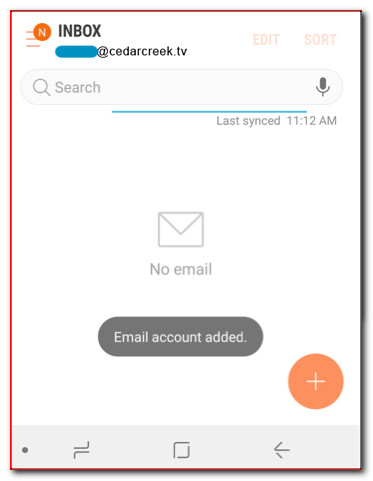
9) Your Office 365 email is now set up in your Android native mail app. Open that app and confirm that it syncs and to make sure you can send messages, compose an email and send it to yourself.
Note: Before doing the following, first configure your webmail so you are logged in and your timezone is set at a minimum. See steps #4 and #5 of the “PC Outlook Software and Webmail” section above.
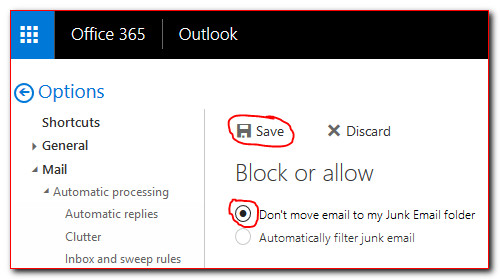
1) You will want to disable Office365 Online from spam filtering if you are relying on Gmail spam filtering. If you do not do this, email may be moved to your “junk” folder on Office365, and Gmail will NOT pull those emails to your Gmail account. You will not receive these emails and will wonder what is happening. To do this, go to https://outlook.office.com/owa/?path=/options/blocksenders and under “Block or allow” change “Automatically filter junk email” to “Don’t move email to my Junk Email folder” and click Save at the top.
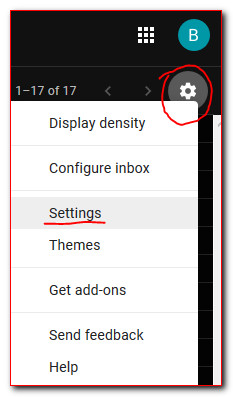
2) Log into Gmail and click on the gear icon by the top right corner.
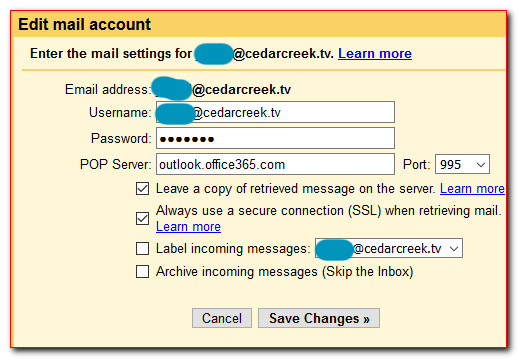
3) Click “Add New” in the “Check Mail from Other Accounts” section and enter your cedarcreek email address you want to check. Click Next on that screen and it will ask if you want to import them via POP3, which you do, so hit Next again. Finally, enter these settings and click “Add Account”:
- Username: YourEmail@cedarcreek.tv
- Password: YourPassword
- POP Server: outlook.office365.com
- Check the “Leave a copy of retrieved messages on the server” setting if you wish to do leave a copy of emails on your cedarcreek webmail as well as Gmail, or uncheck it to have it delete emails from your cedarcreek inbox when it pulls them to Gmail’s inbox.
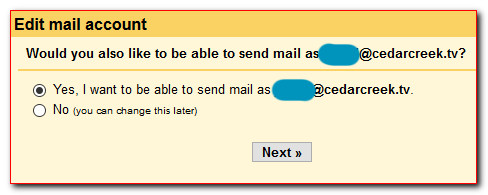
4) It will now ask if you wish to send as the account as well. Check “Yes, I would like to send on behalf of…” and hit Next.
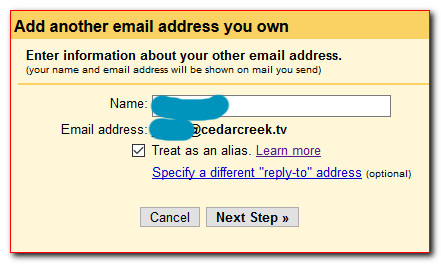
5) Enter the name you want people to see when you send from your creek email, leave “Treat as an alias” checked and press Next Step.
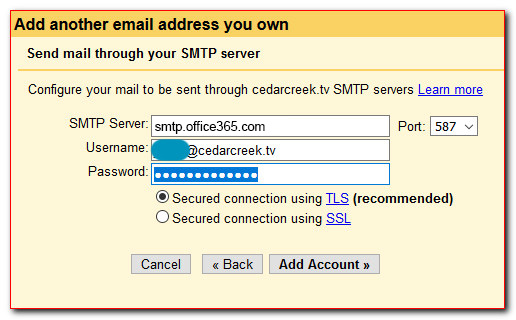
6) Enter the following settings and press “Add Account”:
- SMTP Server: smtp.office365.com
- Username: YourEmail@cedarcreek.tv
- Password: YourPassword
- Leave TLS selected
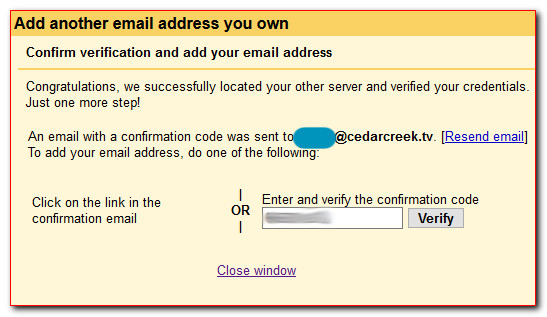
7) Confirm your addition via a link emailed to your cedarcreek account (which you can check in our webmail https://outlook.office365.com) or by entering the code they emailed there manually.
8) Once verified, you should now see both an entry for your CedarCreek email in the “Send Mail As” and “Check Mail from Other Accounts” sections.
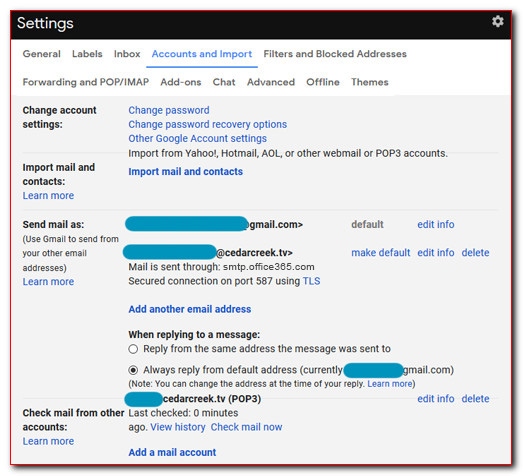
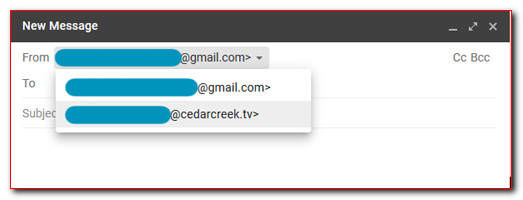
9) Now emails sent to your email address at CedarCreek will show up in your Gmail account. Also when sending from Gmail, you should have the option to drop down the “from” address field and choose your cedarcreek address. This should help prevent others from seeing your personal Gmail address and make your communications more official.
Type: Exchange or EAS or Active Sync
Mail server: outlook.office365.com (some require https:// before this)
Domain: (leave this blank)
Username: (your login)@cedarcreek.tv
Email address: (your login)@cedarcreek.tv
SSL: on
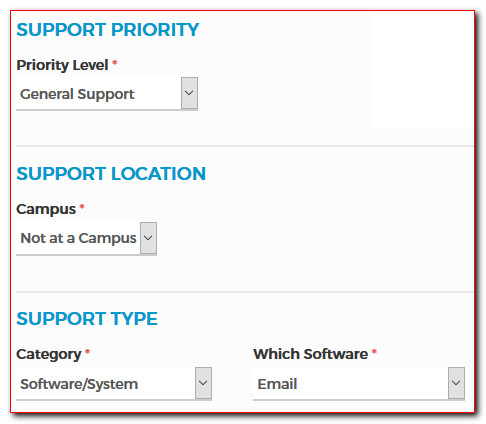
- Support Priority: General Support
- Support Location: Not at a Campus
- Support Type: Software/System
- Which: Email